
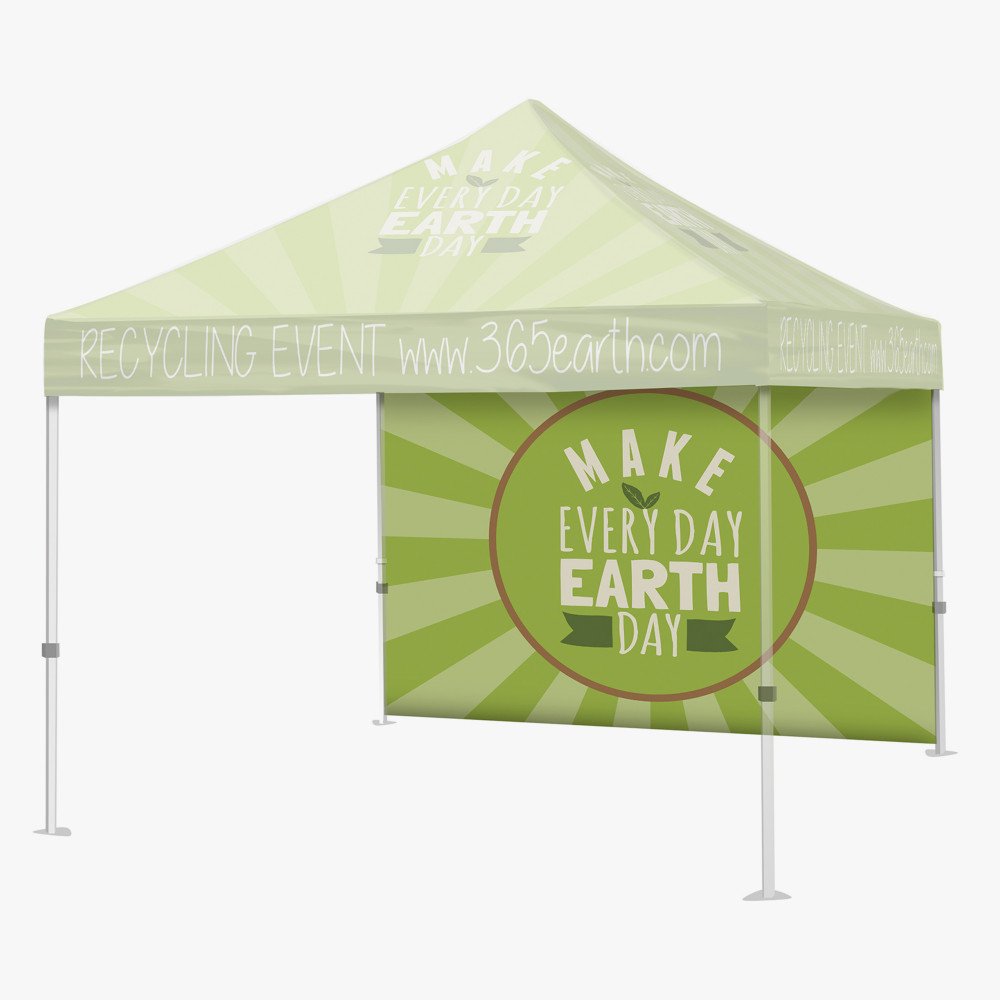
Custom 10ft tent wall printing in Tampa for compatible 10×10 event tents, trade shows, markets, festivals and branded outdoor booth displays.
- Full-color dye-sublimated 6 oz tent fabric
- Weather-resistant coated polyester for outdoor events
- Full walls attach directly with sewn Velcro loops
- Half walls include a top pole pocket and side Velcro loops
- Half walls available single- or double-sided
- Full walls available with single-sided printing
- Compatible half-wall support hardware available
10ft Tent Walls
Custom 10ft tent wall printing in Tampa for compatible 10×10 event tents, trade shows, markets, festivals and branded outdoor booth displays.
- Full-color dye-sublimated 6 oz tent fabric
- Weather-resistant coated polyester for outdoor events
- Full walls attach directly with sewn Velcro loops
- Half walls include a top pole pocket and side Velcro loops
- Half walls available single- or double-sided
- Full walls available with single-sided printing
- Compatible half-wall support hardware available
Custom 10ft Tent Wall Printing in Tampa
Add Branded Full or Half Walls to Your Event Tent
Expand a compatible 10×10 event tent with custom printed full walls or half walls for added branding, booth organization, service counters, backdrops and temporary event displays.
Each wall is printed on 6 oz polyester tent fabric using full-color dye-sublimation printing for vivid logos, photographs, menus, sponsor graphics, service information and promotional messaging.
Choose a full-height wall for maximum coverage and branding, or a half wall when you want to define the lower part of the booth while keeping the upper section open.
Printed Tent Fabric
6 oz Polyester with Full-Color Dye-Sublimation
Custom tent walls are produced from 6 oz polyester fabric with 600 × 600 denier construction and a water-resistant coated surface.
Material
6 oz Polyester
Flexible event tent fabric designed for compatible indoor and temporary outdoor displays.
Printing
Full-Color Dye-Sub
Dye-sublimation printing produces vivid logos, photographs, gradients and branded graphics.
Surface
Weather-Resistant Finish
The coated fabric provides water resistance and a scratch-resistant printed finish for temporary event use.
Features & Options
Choose a Full Wall or Half Wall
Full Coverage
10ft Full Wall
Measures 113″W × 78″H and provides a large branded backdrop, privacy area or partial enclosure for a compatible event tent.
Open Layout
10ft Half Wall
Measures 113″W × 39″H and creates a lower booth boundary while keeping the upper section open for customer interaction.
Compare Wall Styles
Full Wall vs. Half Wall
| Feature | Full Wall | Half Wall |
|---|---|---|
| Finished Size | 113″W × 78″H | 113″W × 39″H |
| Printing | Single-sided | Single- or double-sided |
| Top Attachment | Velcro loops below canopy | Pole pocket with support pole |
| Side Attachment | Velcro loops around legs | Velcro loops around legs |
| Additional Hardware | Not required | Support pole and two hex clamps |
| Best Use | Backdrop, privacy and partial enclosure | Counter, barrier and open booth layout |
Full-Wall Option
Full Walls for Backdrops and Booth Coverage
The full wall measures 113 inches wide × 78 inches high and attaches directly beneath the canopy and along the tent legs with sewn Velcro loops.
No separate horizontal support pole is required. When correctly installed, the wall extends to approximately four inches above the ground.
Full walls are available with single-sided printing only, so position the printed face toward the main customer viewing direction.
Half-Wall Option
Half Walls for Counters and Open Booth Layouts
The half wall measures 113 inches wide × 39 inches high and helps create a service counter, customer barrier or branded booth boundary without fully enclosing the display.
A pole pocket along the top accepts the compatible telescopic support pole, while sewn Velcro loops secure the sides to the tent legs.
Half walls are available with either single-sided or double-sided printing.
Double-Sided Half Walls
Print Different Graphics Inside and Outside the Tent
Double-sided half walls allow branding or information to be visible from both directions.
You can use different exterior and interior artwork when needed. Submit each design as a separate file and clearly identify which side should face customers outside the tent.
Half-Wall Hardware
Telescopic Support Pole and Hex Clamps
Each compatible half-wall setup uses one telescopic aluminum support pole and two compatible hex clamps.
Support
Telescopic Pole
The aluminum pole slides through the top pole pocket and supports the upper edge of the half wall.
Attachment
Two Hex Clamps
Compatible clamps attach the support pole between two event tent legs.
Confirm your tent frame and leg profile before ordering replacement walls or hardware.
Branded Event Displays
Create the Booth Configuration Your Event Needs
Combine full and half walls to control customer flow, build service areas, create branded backdrops or organize different sections inside the event tent.
- Farmers markets and vendor fairs
- Food and beverage service tents
- Outdoor festivals
- Community events
- School and university programs
- Sporting events
- Fundraising programs
- Trade shows and exhibitions
- Registration tents
- Product demonstrations
- Mobile retail displays
- Branded booth backdrops
Outdoor Safety
Secure the Tent Before Installing Walls
- Fully assemble and anchor the compatible event tent first
- Remember that adding walls increases wind pressure on the frame
- Secure every tent leg with suitable stakes, ropes, sandbags or approved weights
- Do not use walls during strong wind, thunderstorms, heavy rain or severe weather
- Do not use tent walls as permanent outdoor enclosures
- Never leave the assembled tent unattended outdoors
- Follow venue, property, fire-code and local event requirements
Specifications
10ft Tent Wall Specifications
| Specification | Details |
|---|---|
| Material | 6 oz polyester tent fabric |
| Construction | 600 × 600 denier |
| Printing | Full-color dye-sublimation |
| Surface | Water-resistant coated fabric with scratch-resistant printed finish |
| Full Wall Size | 113″W × 78″H |
| Half Wall Size | 113″W × 39″H |
| Full Wall Printing | Single-sided only |
| Half Wall Printing | Single- or double-sided |
| Full Wall Attachment | Sewn upper and side Velcro loops |
| Half Wall Attachment | Top pole pocket with side Velcro loops |
| Half Wall Hardware | One telescopic support pole and two compatible hex clamps |
Compatibility
Designed for Compatible OneStop 10ft Event Tent Hardware
These walls are designed for compatible OneStop 10ft Event Tent hardware.
Fit is not guaranteed on third-party frames. Confirm frame dimensions, leg shape, attachment positions, pole dimensions and clamp specifications before ordering for other tent hardware.
Artwork Requirements
10ft Tent Wall File Setup
| File Requirement | Recommended Setup |
|---|---|
| Accepted Formats | PDF or JPEG |
| PDF Setup | Submit a single-page PDF for each printed wall side |
| Color Mode | CMYK |
| Resolution | 150 DPI at full finished size |
| Maximum Upload | 300 MB |
| Artwork Dimensions | Use the supplied full-wall or half-wall template |
| Template Scaling | Do not resize the artboard or change template proportions |
| Bleed | Follow all bleed, seam and finishing areas shown in the template |
| Crop Marks | Do not include unless specifically requested |
| Fonts | Convert live fonts to outlines |
| Colors | Convert Pantone and spot colors to CMYK |
Templates
Use the Correct Full-Wall or Half-Wall Template
- Use the dedicated template for the wall type selected
- Do not adjust the artboard dimensions
- Do not resize or remove required guidelines
- Keep the original template orientation
- Place final artwork on the designated artwork layer where applicable
- Review seams, pole pockets and Velcro areas before export
- Check all bleed and safety margins
Double-Sided Artwork
Prepare Half-Wall Front and Back Files Separately
- Upload exterior and interior designs as two separate files
- Clearly label each file Exterior or Interior
- Use identical template dimensions for both sides
- Use the same orientation for both sides
- Confirm which graphic should face customers outside the tent
- Do not combine both sides into a multi-page PDF unless requested
Artwork Safety Areas
Keep Important Graphics Clear of Attachment Areas
- Keep logos and text away from Velcro attachment areas
- Keep full-wall graphics away from seams and finished edges
- Keep half-wall artwork away from the top pole pocket
- Allow space around side Velcro loops
- Position QR codes where they remain easy to scan
- Keep important branding above tables and products where possible
Design Tips
Create Effective Event Tent Wall Graphics
Logo
Make Branding Visible
Use a large primary logo that remains recognizable throughout the event space.
Message
Keep Copy Short
Use short promotional messaging that customers can understand quickly.
Contrast
Improve Readability
Use strong contrast between important text and background colors.
Artwork
Use High-Quality Files
Upload vector logos and high-resolution images for cleaner fabric printing.
Placement
Design Around the Booth
Place important information where tables, merchandise and staff will not cover it.
Consistency
Coordinate Your Display
Match wall colors and artwork with your canopy, table covers, flags and signs.
Installation
Full-Wall Installation
- Fully assemble and securely anchor the event tent
- Position the wall beneath the selected canopy side
- Face the artwork toward the intended viewing direction
- Attach the upper Velcro loops to the frame
- Wrap the side Velcro loops around the tent legs
- Adjust the graphic until it hangs evenly
- Avoid excessive tension on the wall
- Inspect every attachment and anchoring point before use
Half-Wall Installation
Install the Support Pole and Clamps
- Fully assemble and anchor the event tent first
- Attach the two hex clamps at matching heights
- Slide the telescopic pole through the top pole pocket
- Connect the pole to both clamps
- Extend the pole evenly without overstretching the fabric
- Secure the side Velcro loops around the tent legs
- Inspect the pole, clamps, fabric and anchoring before use
Care & Storage
Protect Your Printed Tent Walls
- Remove wall graphics before collapsing the tent frame
- Allow fabric to dry completely before storage
- Keep printed surfaces away from sharp objects
- Avoid abrasive materials
- Do not pull excessively on Velcro loops or pole pockets
- Fold walls carefully to reduce deep creases
- Store fabric and hardware in a clean, dry indoor location
Tampa Tent Wall Printing
Custom 10ft Tent Walls in Tampa
OneStop Design & Print provides custom 10ft tent wall printing for Tampa businesses, restaurants, vendors, schools, festivals, sports teams, trade shows and community events.
Choose a full-height or half-height configuration, select your print option and upload print-ready artwork or request design assistance for your branded event booth.
Related Event Products
Build a Complete Branded Event Display
20ft Tent Full Wall
Need walls for a larger 10×20 canopy? Explore long-side and short-side full-wall options.
Custom Event Tents
Browse custom canopy tents and branded event display options for markets, festivals and trade shows.
6ft Table Cover
Add a coordinated branded table cover to complete your booth or event display.
Custom 10ft Tent Walls
Add More Branding and Structure to Your Event Booth
Choose full or half walls with custom dye-sublimated graphics for your Tampa trade show, market, festival or outdoor promotion.
10ft Tent Wall FAQ
Frequently Asked Questions
What is the difference between a full wall and a half wall?
A full wall measures 113 × 78 inches and creates a large branded backdrop or partial enclosure. A half wall measures 113 × 39 inches and creates a lower booth boundary while keeping the upper area open.
Can the tent walls be printed on both sides?
Half walls are available with single-sided or double-sided printing. Full-height walls are available with single-sided printing only.
Do full tent walls require additional hardware?
No separate support pole is required. Full walls attach beneath the canopy and around the tent legs using sewn Velcro loops.
What hardware is required for a half wall?
A compatible half wall uses one telescopic aluminum support pole and two hex clamps.
Can I use different artwork on each side of a half wall?
Yes. Double-sided half walls can use different exterior and interior artwork. Upload each design separately and label the files clearly.
Can these walls fit another brand of 10×10 tent?
Compatibility is not guaranteed. Confirm the frame dimensions, leg shape, attachment points, pole dimensions and clamp specifications before ordering for third-party hardware.
What material are the tent walls made from?
The walls are produced from 6 oz polyester tent fabric with 600 × 600 denier construction and a water-resistant coated surface.
Do you offer custom 10ft tent wall printing in Tampa?
Yes. OneStop Design & Print provides custom 10ft tent wall printing for Tampa businesses, restaurants, vendors, schools, festivals, sports teams, trade shows and community events.
Customer Reviews
Share your experience—leave a review.
 Posted on Google
 Mahmoud Atwa
 The team there is so professional and they were kind enough to answer all my questions on the phone!Posted on Google
 Benjamin BurkhalterAwesome place , the guy that helped me was tremendously nice and respectful and helpful. They are fast and professional and want to win your business, I definitely look forward to working with them again, they seem to have a great variety of things they can help you with and don’t nickel and dime you, give them a go!!Posted on Google
 Matt G**Review for One Stop Signage Company** I recently had the pleasure of working with One Stop Signage Company for a project that required custom signage for my business, and I cannot recommend them highly enough! From start to finish, the entire experience was seamless, professional, and exceeded my expectations. **Quality of Work:** The quality of the signage they produced is outstanding. The materials used are durable, and the printing is vibrant and precise. The attention to detail is evident in every aspect of their work, from the design to the final installation. The signs look incredibly professional and have already garnered compliments from customers. **Customer Service:** The team at One Stop Signage is truly exceptional. They were incredibly responsive, patient, and attentive to my needs. They took the time to understand my vision and provided expert guidance to ensure the final product was perfect. Their communication throughout the process was clear and timely, which made the entire experience stress-free. **Design Expertise:** Their design team is incredibly talented. They took my initial ideas and transformed them into a stunning, cohesive design that perfectly represents my brand. They were open to revisions and made sure I was 100% satisfied before moving forward with production. **Timeliness:** One Stop Signage delivered the project on time, which was crucial for my business launch. They managed to meet a tight deadline without compromising on quality, which I truly appreciated. **Value for Money:** Considering the high-quality materials, craftsmanship, and excellent service, the pricing is very reasonable. They offer great value for the level of expertise and professionalism they provide. **Overall Experience:** Working with One Stop Signage Company was an absolute pleasure. They are a reliable, creative, and customer-focused business that delivers top-notch results. If you’re looking for a signage company that combines quality, professionalism, and outstanding service, look no further. I will definitely be using them for all my future signage needs! **Rating:** ⭐⭐⭐⭐⭐ (5/5) Thank you, One Stop Signage, for helping my business stand out with your incredible work!Posted on Google
 Adham ElbazGreat service and quality finishes. The signs came out even better than we expected and the material was impeccable. Can’t recommend enough
Owner's reply
Thank you so much for your amazing feedback! We're thrilled to hear that you loved the service, quality, and signs. It's wonderful to know that everything exceeded your expectations. We look forward to working with you again in the future!Posted on Google Custom Corner"Excellent quality, quick delivery, and unmatched prices!"
Owner's reply
Thank you so much for your fantastic review! We're thrilled to hear that you are pleased with our quality, delivery speed, and pricing. We look forward to serving you again soon.Posted on Google Mohamed Eldeifi❤️❤️❤️
Owner's reply
Thank you so much for the love and support! We're thrilled to know you had a great experience with us. We look forward to serving you again in the future!Posted on Google Амир АрифовI was looking for the good Print company and hopefully I found it. These guys made me a banner with good quality for the lower price
Owner's reply
Thank you so much for your positive feedback! We're delighted to hear that you're satisfied with the banner's quality and price. It's our goal to provide excellent service, and we're thrilled to have met your expectations. We look forward to serving you again!Posted on Google Omar AboseadaVery professional and very good quality highly recommended
Owner's reply
Thank you for your kind words and recommendation! We are thrilled to hear that you are satisfied with our services and quality. We look forward to serving you again in the future.Posted on Google Mahmoud AfifiI’ve been doing business with Onestop since their days in Wisconsin, and they’ve always been my go-to for printing needs. When they moved to Florida, I tried working with 2-3 other printing companies, but none of them came close to Onestop’s quality and service. On top of that, the alternatives were even more expensive! I decided to give Onestop a call, and I’m so glad I did. They told me they could ship anything I needed directly to me, even though they’re now based in Tampa. That was the best news ever! The quality of their work is unmatched, and their customer service is just as fantastic as I remember. It feels great to know I can still count on Onestop no matter where they are. Highly recommended!
Owner's reply
Thank you for your kind words and continued support! We're thrilled to hear that our quality and service continue to meet your expectations, even from afar. Shipping directly to you is just one of the ways we strive to make sure your experience with us is hassle-free and convenient. Your recommendation means a lot to us, and we look forward to assisting you with future printing needs. Thanks again!
Onestop Design & Print
- 2437 S 86th St E, Tampa, FL 33619
- (813) 400‑3327
- sales@onestopdp.com
- Opening Hours: 10:00am - 5:00pm
- 2437 S 86th St E, Tampa, FL 33619
- (813) 400‑3327
- sales@onestopdp.com
- Opening Hours: 10:00am - 5:00pm